
In this tutorial we'll learn how to build a API using NodeJS, ExpressJS, and MongoDB with custom API key authentication. We'll build features such as user registration, API key generation, and credit-based access control for paid apps. To test all of this we'll be using Postman.
Setting Up the Project
So let's setup our project and if you haven't already we'll be creating a new folder, going into it and then initializing it as a npm package. So for this I'll be running these commands:
mkdir my-api
cd my-api
npm init -y
Next we'll install the packages we'll need for our projects so we don't have to install them later.
npm install express mongoose dotenv cors uuid jsonwebtoken bcryptjs
Folder Structure
Let's take a look at our folder structure so far.

Create .env file
Great now in our .env we'll add a few things: the port, mongo uri and secret key for our api.
PORT=5000
MONGO_URI=
SECRET_KEY=
Setup Express Server
Next we'll start setting up the index.js file and Express. This will serve as the entry point for our server. At a high level we'll initilize Express, connect with MongoDB, and create the "/" route.
require("dotenv").config();
const express = require("express");
const mongoose = require("mongoose");
const cors = require("cors");
const authRoutes = require("./routes/auth");
const dataRoutes = require("./routes/data");

const app = express();

app.use(express.json());
app.use(cors());
app.use("/api/auth",authRoutes);
app.use("/api",dataRoutes);

const PORT = process.env.PORT || 5000;

mongoose.connect(process.env.MONGO_URI).then(()=>console.log("Mongodb is connected")).catch((err)=>console.log(err));

app.get("/",(req,res)=>{
  res.send("Welcome to my api");
});

app.listen(PORT,()=>console.log(`Server is running on PORT ${PORT}`));
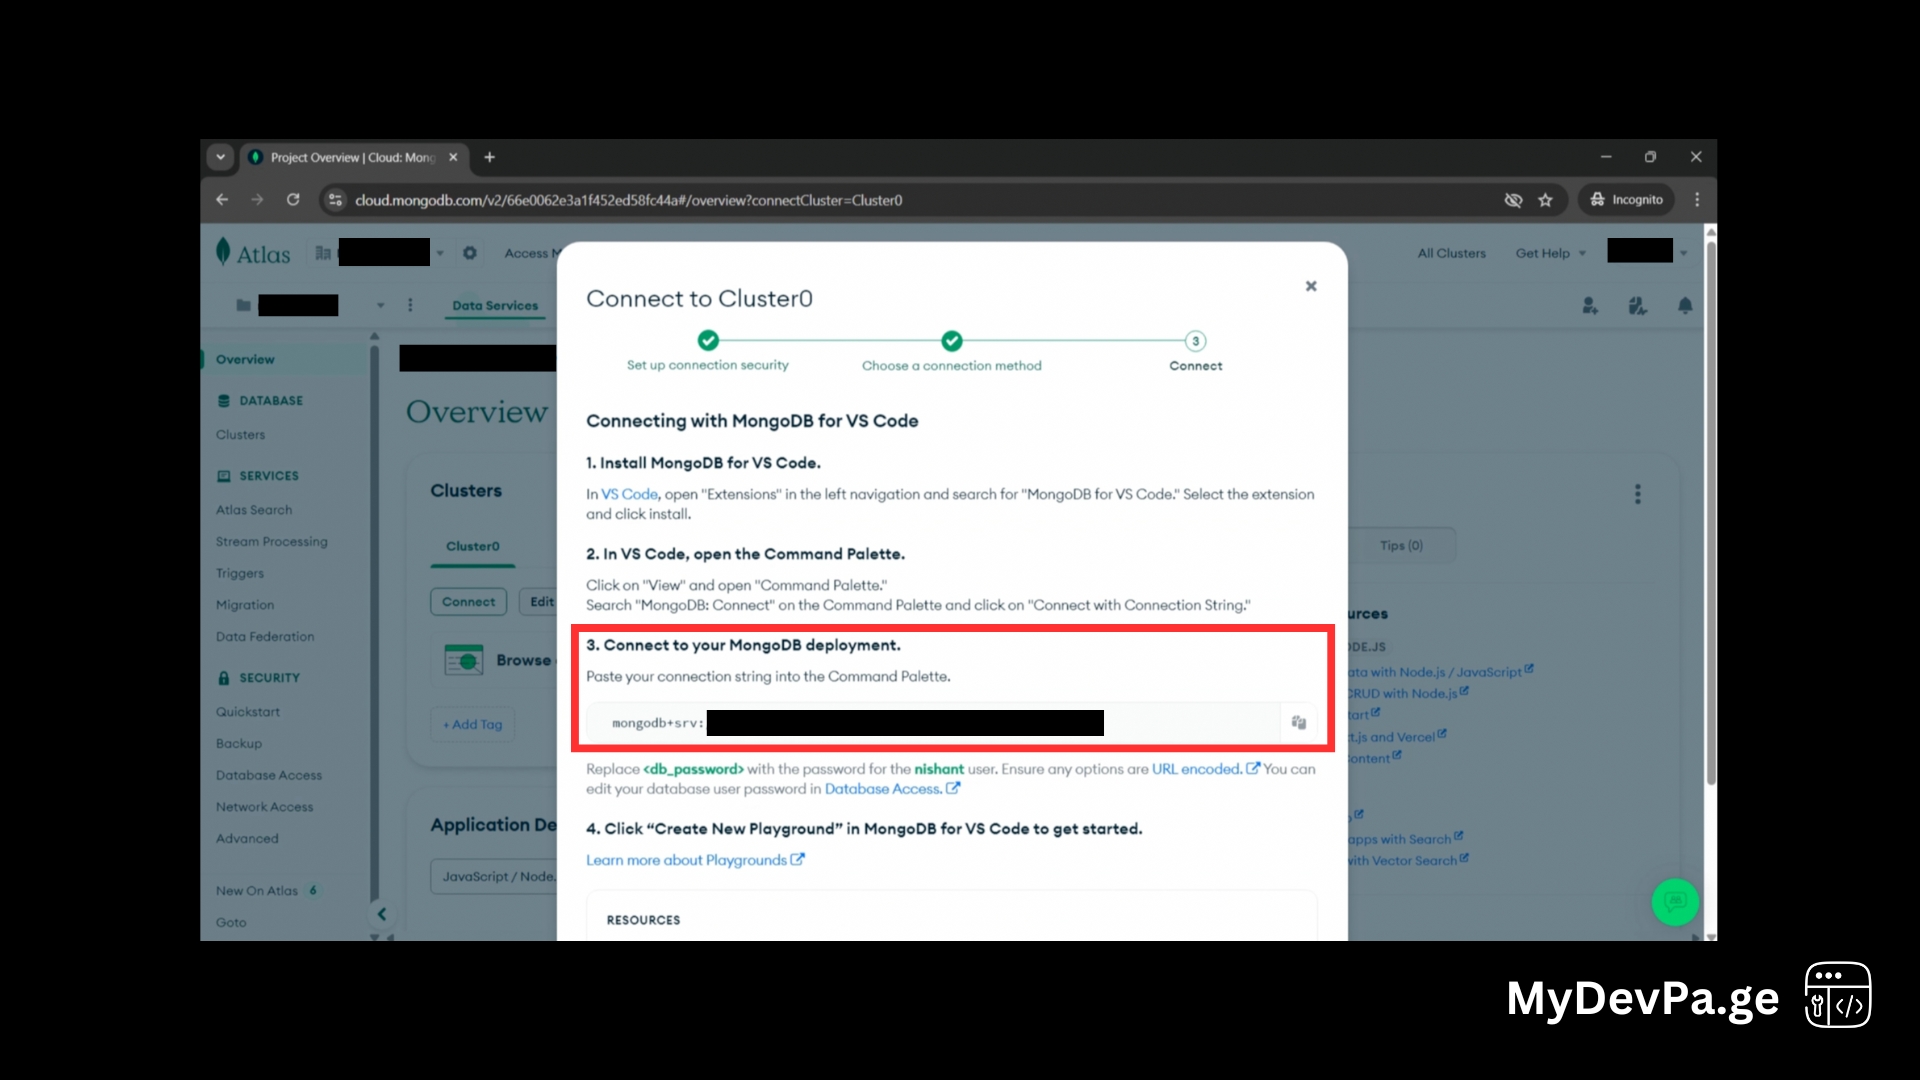
Go to MongoDB and signup/login and create cluster
So now if you already have a MongoDB account you can use that but if you don't have a account sign up first, it's free!
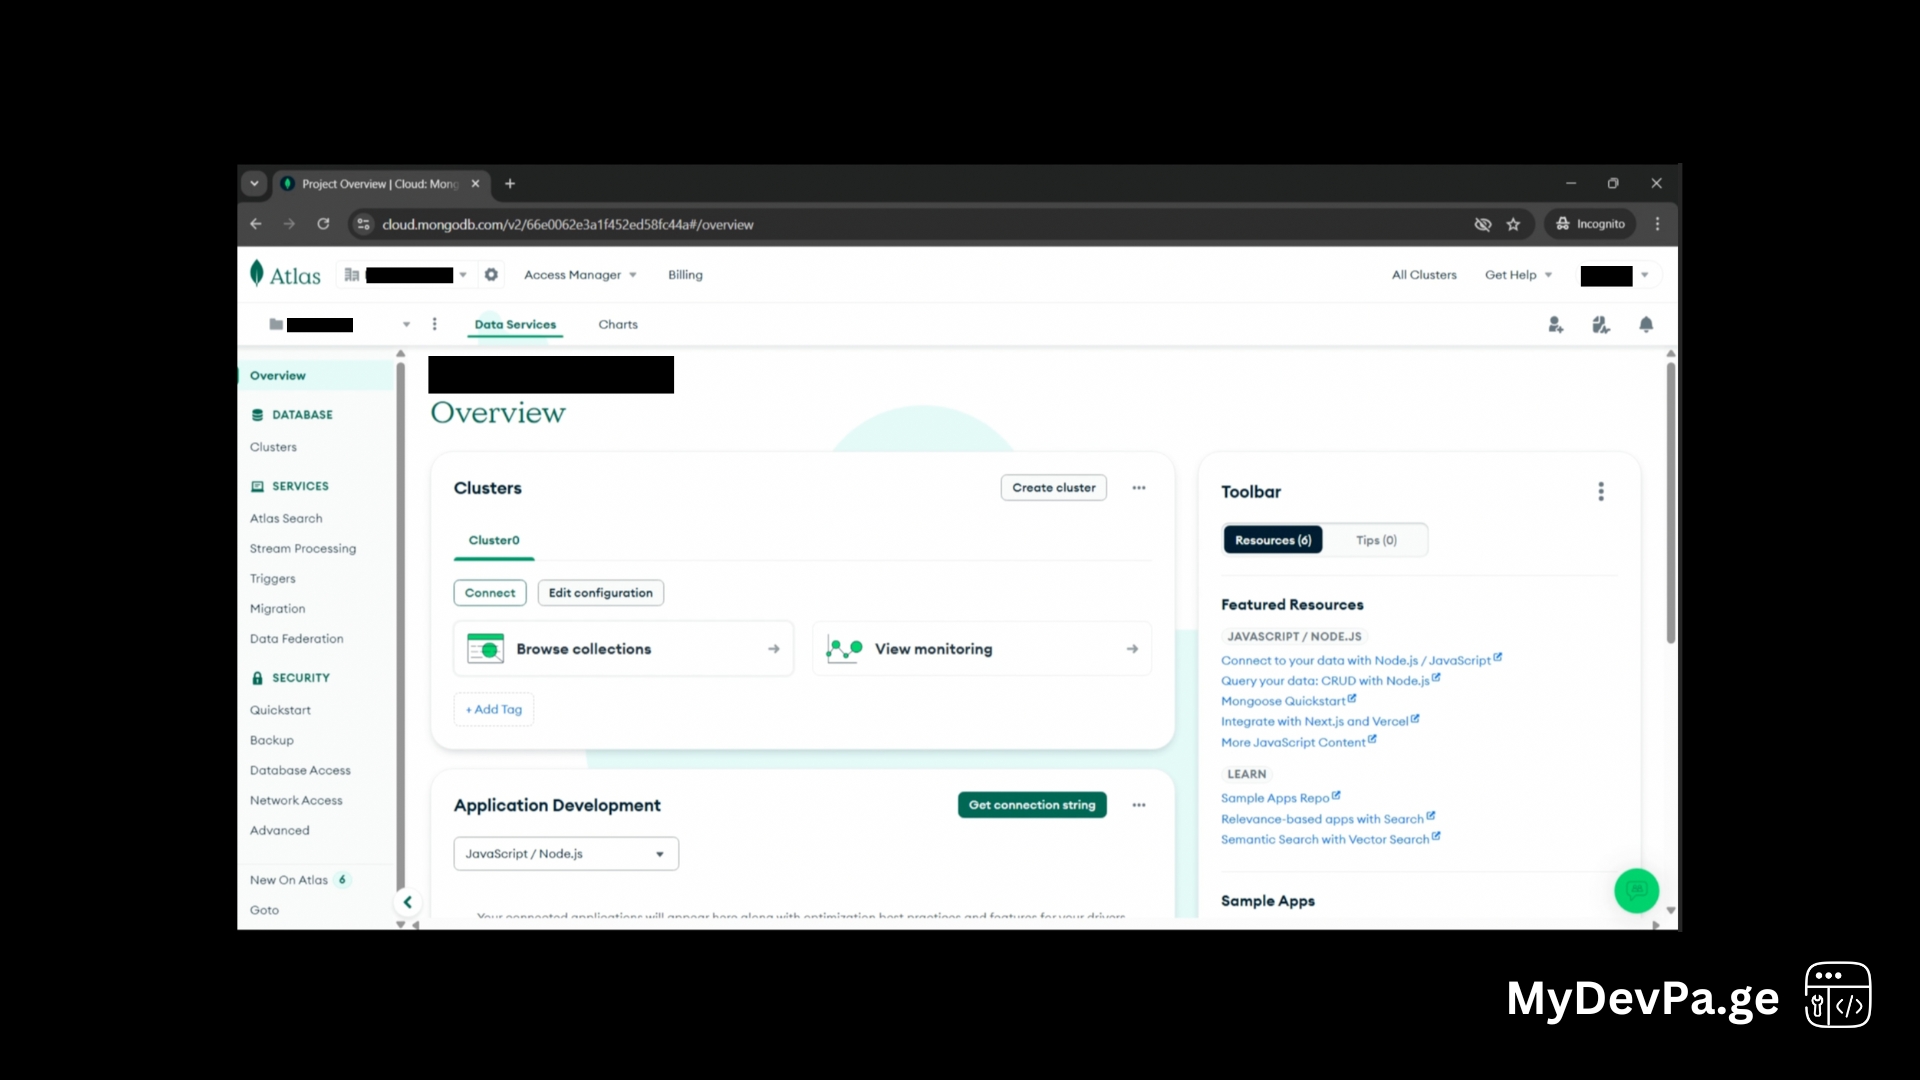
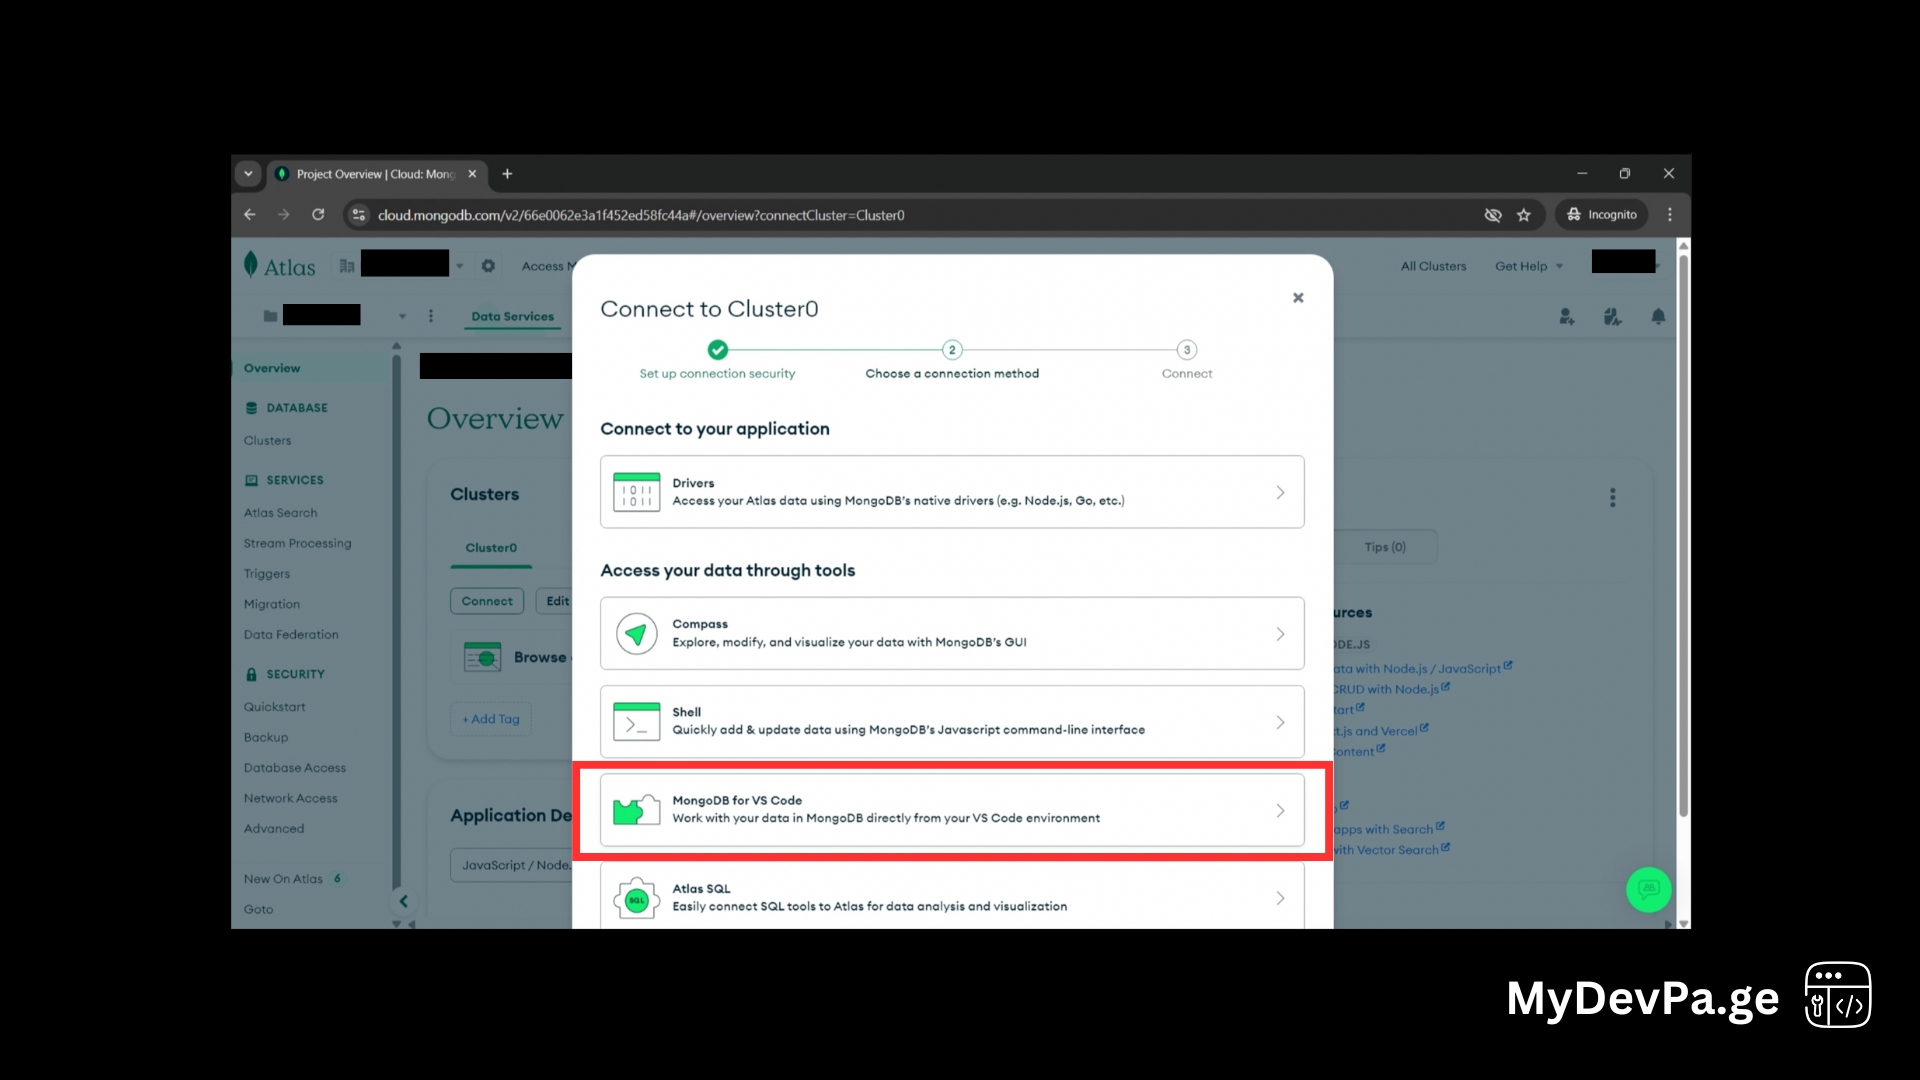
After signing up create a cluster and get the Monogo URI by going to Connect > Mongo for VSCode > Copy Mongo URI. Then we'll paste that in our .env file > MONGO_URI.
Run the Server
After all that let's start the server to make sure it's working and there are no errors so far.
node index.js
In your terminal you should now see:
Server running on port 5000
Create User Model
Now we'll work on creating the User model so let's create a new folder + file > models/User.js. There we will create the User schema and utilize the uuid.
const mongoose = require("mongoose");
const { v4: uuidv4} = require("uuid");

const userSchema = new mongoose.Schema({
  name:String,
  email:{type:String, unique: true},
  password:String,
  apiKey:{type:String, default: uuidv4},
  credits:{type:String, default:100},
});

module.exports = mongoose.model("User", userSchema);
User Registration with API Key
Now we'll create the /register route so lets create a new folder + file > routes/auth.js. At a high level to register the user will need to send: name, email and password. Then we'll look in MongoDB if the user already exists based on the email. If the user does not exist then we'll create the new user and also add 100 credits to get the user started. It's a pretty common pattern with AI tools nowadays where you get free credits for signing up.
const express = require("express");
const bcrypt = require("bcryptjs");
const User = require("../models/User");

const router = express.Router();

router.post("/register", async(req,res)=>{
  const{ name,email,password} = req.body;

  let user = await User.findOne({email});
  if(user) return res.status(400).json({message:"User already exists"});

  const salt = await bcrypt.genSalt(10);
  const hashedPassword = await bcrypt.hash(password,salt);

  user = new User({name,email,password:hashedPassword, credits:100});
  await user.save();

  res.json({message:"User registered successfully", apiKey: user.apiKey});

});
module.exports = router;
Connect the route in index.js
Now we'll import the route in our index.js and use it as a /api/auth route.
// import the auth routes
const authRoutes = require("./routes/auth");

// then create the api route
app.use("/api/auth", authRoutes);
Test with Postman
Alright now we can start testing on Postman to see if things are working properly. So we'll be doing:
For the Body we'll send an object like this so we can register the user.
Body (JSON):
{
  "name": "hello",
  "email": "[email protected]",
  "password": "123456"
}
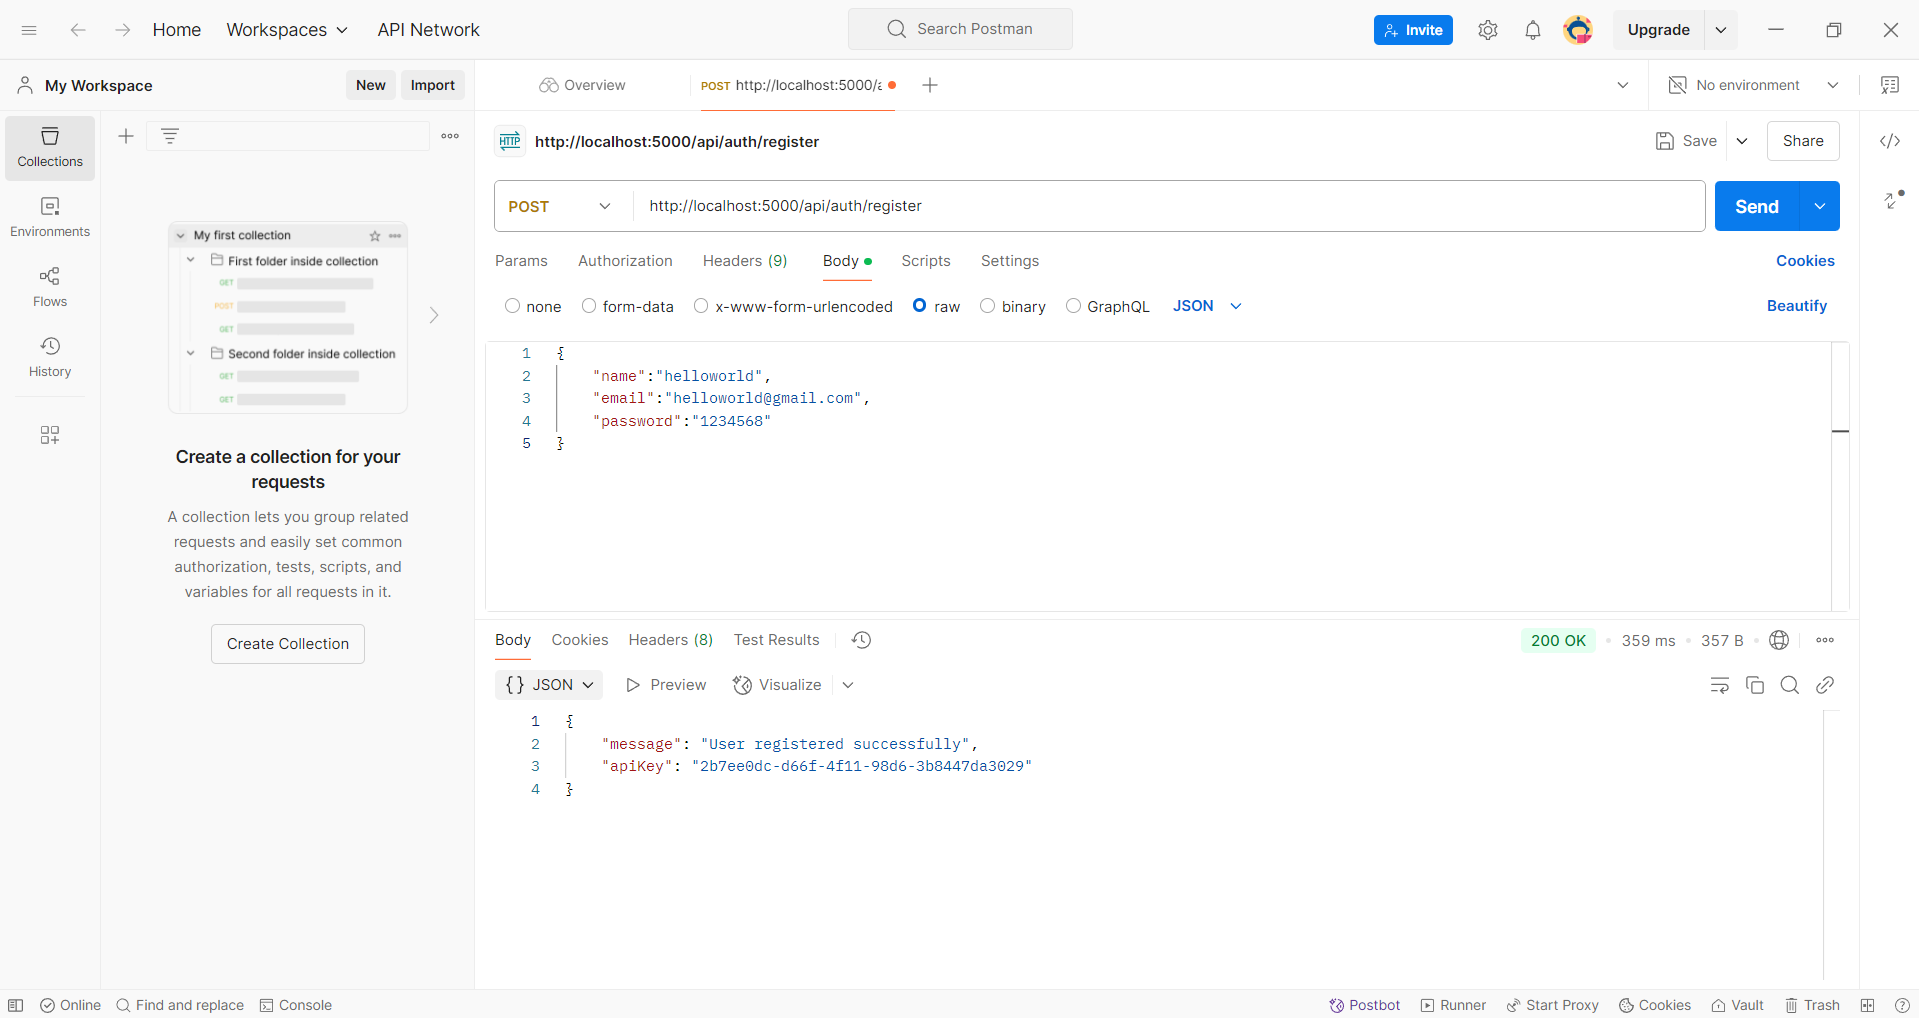
Now if everything is working then we'll get a status of 200 and also the apiKey for the created user.
{
  "message": "User registered successfully",
  "apiKey": "550e8400-e29b-41d4-a716-446655440000"
}
Secure API with API Key Authentication
Great next we'll work on making our api more secure so everything a user makes a call we'll check whether there is a valid API key or not. If there is no API key then we'll give a 401 unauthorized status. So lets create the new folder + file > middleware/auth.js.
A few things to note we'll also check if there is enough credit in this case greater than 0. If there is no more credits then we'll send then a 402 status. If there is enough credit then we'll subtract by 10 every time the user calls this route.
const User = require("../models/User");

const apiKeyAuth = async (req, res, next) => {
  const apiKey = req.header("X-api-key");
  if(!apiKey) return res.status(401).json({message:"NO api key provided"});

  const user = await User.findOne({apiKey});
  if(!user) return res.status(403),json({message:"Invalid API KEY"});

  if(user.credits<=0){
    return res.status(402).json({message: "Insufficeint Credits, Buy now"});
  }

  user.credits -=10;
  await user.save();

  req.user = user;
  next();

};

module.exports = apiKeyAuth;
Create protected route routes/data.js
Now finally we'll create the folder + file > routes/data.js which will be the data the user is using the credits to get so whatever data you're providing with you API you'll put it in a route like this.
For this example we have two routes /data that returns the data in exchange for credit. Then /usage return how many credits are remaining.
const express = require("express");
const apiKeyAuth = require ("../middleware/auth");
const router = express.Router();

router.get("/data",apiKeyAuth,(req,res)=>{
  res.json({message: "welcome to the protected API", user:req.user.name});
});

router.get("/usage", apiKeyAuth, async(req,res)=>{
  res.json({message:"API usage details", remainingCredits: req.user.credits});
})

module.exports = router;
Finally we'll connect this by adding it to index.js
// import the new data routes
const dataRoutes = require("./routes/data");

// use the data route in the new /api route
app.use("/api", dataRoutes);
Test with Postman:
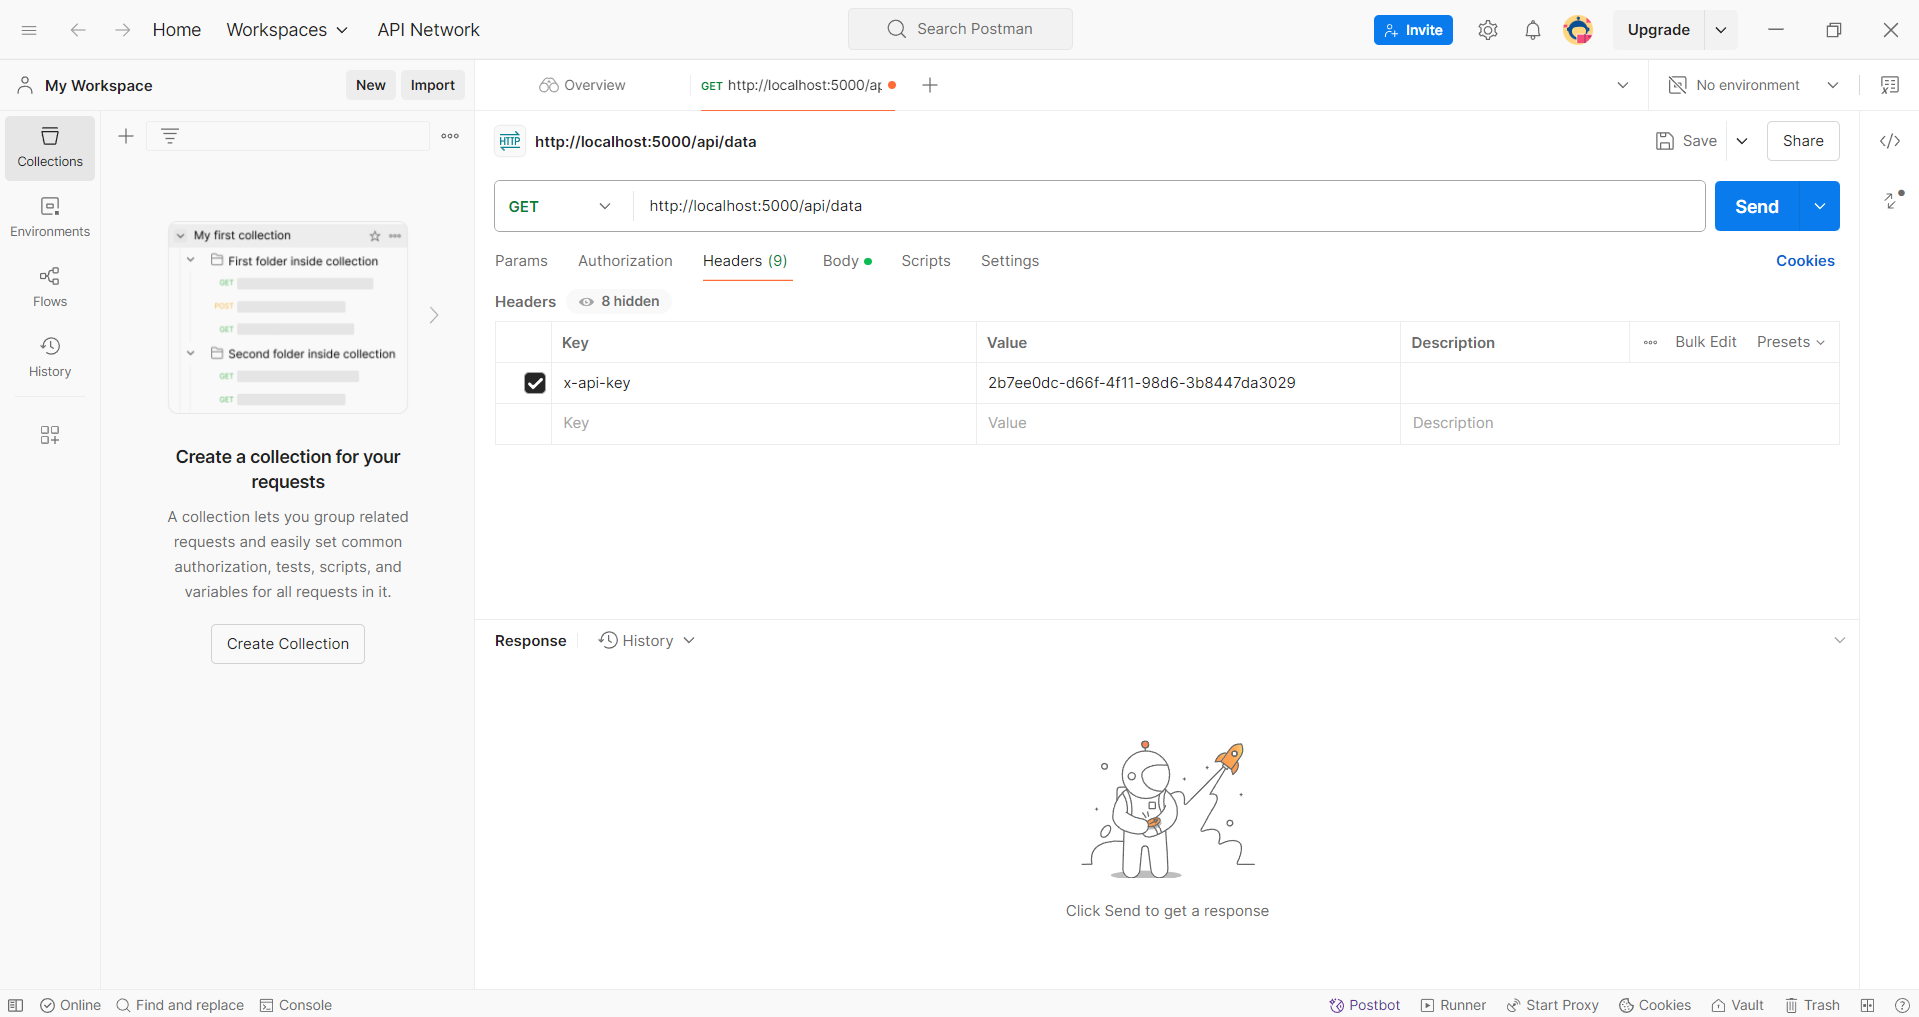
Expected Response:
{
  "message": "Welcome to the protected API!",
  "user": "James"
}

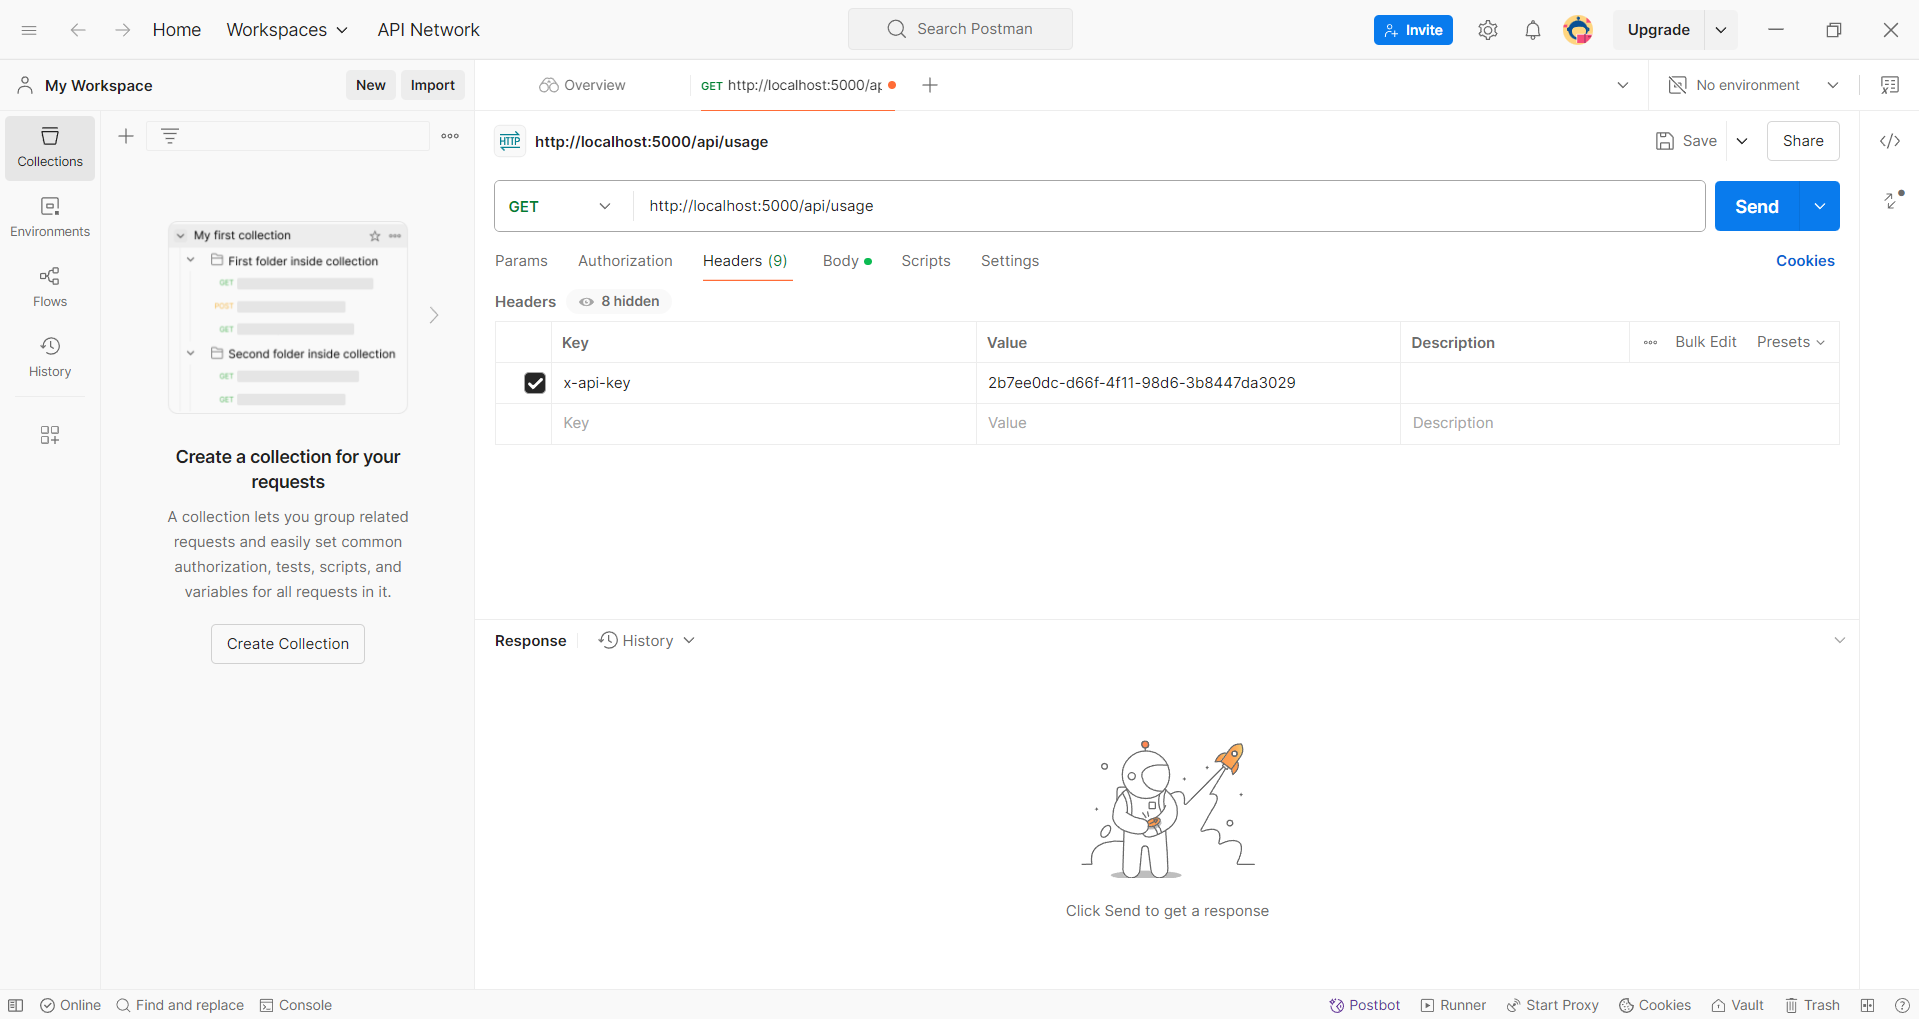
{
  "message": "API usage details",
  "remainingCredits": "90"
}

Conclusion
Congratulations! You've successfully built a secure API with custom API key authentication using Node.js, Express, and MongoDB. This is a great base for your API so make sure to customize it to your liking.
In terms of next step try to focus on:
- Security: By using API keys, you've implemented a robust authentication mechanism that protects your endpoints from unauthorized access.
- Usage Tracking: The credit system allows you to monitor and control how frequently users access your API, providing valuable insights into usage patterns.
- Monetization Potential: With the credit-based system in place, you've laid the groundwork for potentially monetizing your API through subscription tiers or pay-as-you-go models.
- Scalability: The MongoDB database and Express framework provide a solid foundation that can scale as your user base grows.
Also consider adding:
- API key regeneration for compromised credentials
- Tiered pricing models with different credit allocations
- Rate limiting to prevent abuse
- Analytics dashboard for users to monitor their API usage
- Webhooks for important events like low credit notifications
Remember that security is an ongoing concern, so regularly review and update your authentication to protect against any new threats. With this base API in place, you're ready to expand, develop and deploy professional APIs for your own apps or selling it to others.
Final Thoughts
Now to showcase your new project make sure to signup on our site to create your own portfolio website in just a few minutes for free. Honestly it's the quickest and best way to make a portfolio site and not have to worry about any coding to maintain or update it.
So visit 👉 www.MyDevPa.ge and sign up today!
Full code here in Github!
You can get the full code here in our Github.