Do you want to learn how to add Firebase realtime database to your Next.js application? Well, this is the perfect tutorial for you. We'll learn how to build a live polling system using Firebase Realtime Database in a simple but powerful Poll/Vote app.
You'll learn to create instant, synchronized updates across multiple users - perfect for chat apps, dashboards, and interactive web applications. So, let's dive into building our realtime app.
P.S. At the end of this blog you'll find the Github link to the full and complete source code. If you prefer watching a tutorial video checkout out our Firebase Realtime Database & NextJS Tutorial - Live Poll/Vote App YouTube tutorial.
Folder Structure
Before we start the installation, here's the folder structure of the project that we are going to create. This helps you understand where to place files and maintain organization. You can come back to this anytime.:
/project-root
├── .next                # Auto-generated build files
├── /node_modules        # Dependencies
├── /public              # Static files like favicon
├── /src
│   ├── /app
│   │   ├── /poll        # Poll-related pages
│   │   │   ├── /create  # Poll creation page
│   │   │   │   └── page.tsx
│   │   │   ├── /vote    # Poll voting page
│   │   │   │   └── [id]
│   │   │       └── page.tsx
│   │   ├── globals.css  # Global styles
│   │   ├── layout.tsx   # Layout file
│   │   └── page.tsx     # Default app page
│   └── /lib
│       └── firebase.ts  # Firebase configuration
├── .gitignore
├── eslint.config.mjs    # Linter configuration
├── next.config.js       # Next.js configuration
├── package.json         # Project metadata and dependencies
├── postcss.config.js    # PostCSS configuration
├── README.md            # Documentation
├── tailwind.config.js   # Tailwind CSS configuration
└── tsconfig.json        # TypeScript configuration
Database Design/Structure
For your reference, this is what the project's Database Design/Structure will look like.
polls
 └── [pollId]                # Unique identifier for each poll
     ├── title: "Poll Title" # Poll's title
     ├── poll_submits: 93    # Total number of submissions
     └── choices             # List of poll choices
         ├── 0               # Choice index
         │   ├── text: "Choice Title 1"
         │   └── count: 82   # Votes for this choice
         └── 1
             ├── text: "Choice Title 2"
             └── count: 45
Key Points:
polls/[pollId]: Stores each poll's details and associated choices.title: Displays the poll's title.poll_submits: Tracks the total number of submissions.choices: Contains the poll's options and their respective vote counts.
Step 1: Create a Next.js project
Start by opening your terminal and change your directory to a desired location. Then we use the command:
npx create-next-app@latest

Step 2: Create a Firebase project
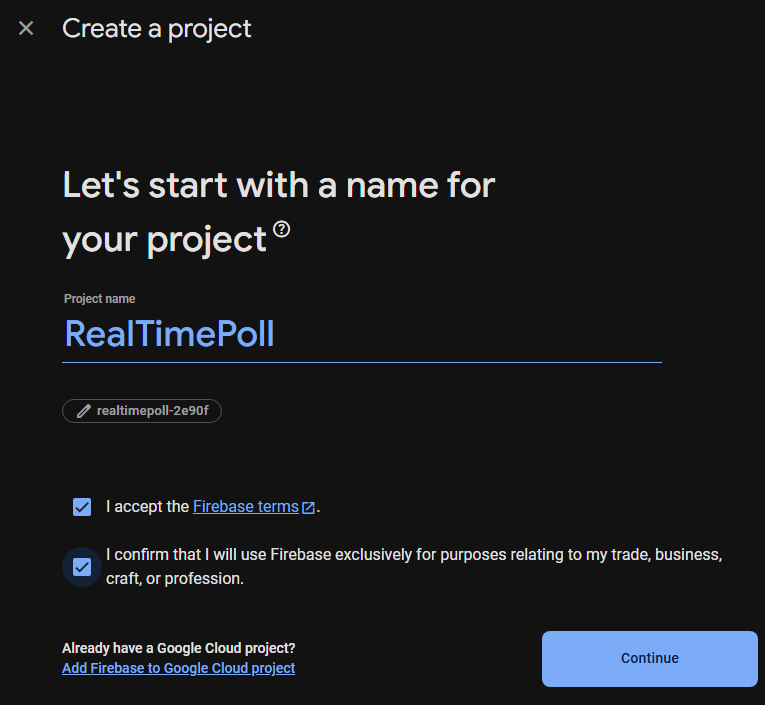
- Navigate to the Firebase Console: Sign in at the Firebase Console with your Google Account.
- Create a project: Click on "Get started with a Firebase project" or "Create Project", and follow through the setup.
Step 3: Setup Firebase
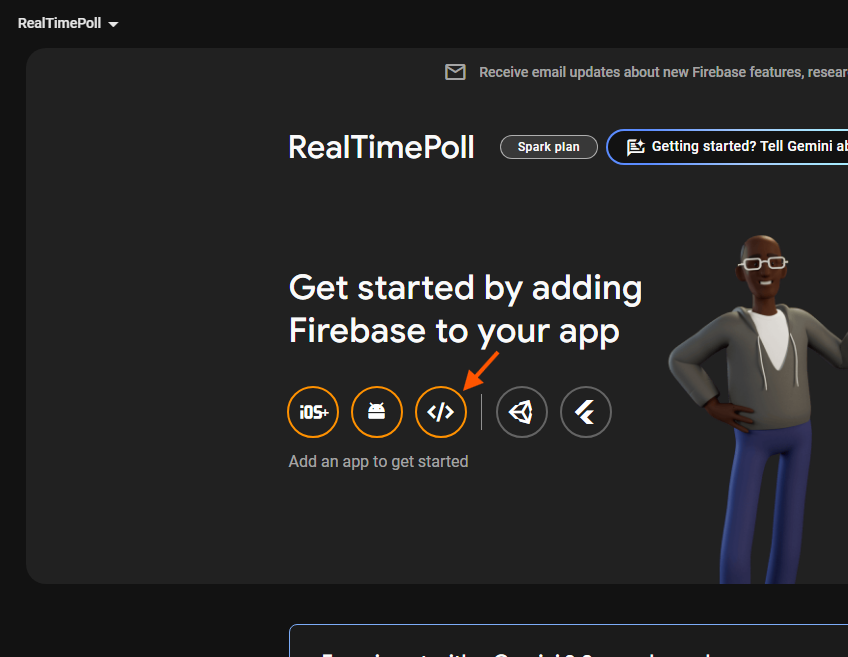
- Add Firebase to your web app: Click on the </> icon, to open the setup
- Give your app a name: This will be used to represent the app in the console.
- Install Firebase SDK: We will have to install the firebase library, and create the
firebase.tsfile within our project.
npm install firebase
On that screen, you will see a block of code that looks something like this:
// src/lib/firebase.ts

// Import the functions you need from the SDKs you need
import { initializeApp } from "firebase/app";
import { getDatabase } from "firebase/database"
// TODO: Add SDKs for Firebase products that you want to use
// https://firebase.google.com/docs/web/setup#available-libraries

// Your web app's Firebase configuration
// For Firebase JS SDK v7.20.0 and later, measurementId is optional
const firebaseConfig = {
  apiKey: "your_api_key",
  authDomain: "xxx.firebaseapp.com",
  projectId: "xxx-xxx",
  storageBucket: "xxx.firebasestorage.app",
  messagingSenderId: "xxx",
  appId: "xx:xx:web:xx",
  measurementId: "xx-xx"
};

// Initialize Firebase
const app = initializeApp(firebaseConfig);
export const db = getDatabase(app);
- Copy that and create a file located in
/src/lib/asfirebase.tsand paste that in. - For security, it is very important that you place the contents of your firebaseConfig in your
.env.localfile
NEXT_PUBLIC_FIREBASE_API_KEY=
NEXT_PUBLIC_FIREBASE_AUTH_DOMAIN=
NEXT_PUBLIC_FIREBASE_PROJECT_ID=
NEXT_PUBLIC_FIREBASE_STORAGE_BUCKET=
NEXT_PUBLIC_FIREBASE_MESSAGING_SENDER_ID=
NEXT_PUBLIC_FIREBASE_APP_ID=
and update your firebase.ts file to use them
const firebaseConfig = {
  apiKey: process.env.NEXT_PUBLIC_FIREBASE_API_KEY,
  authDomain: process.env.NEXT_PUBLIC_FIREBASE_AUTH_DOMAIN,
  projectId: process.env.NEXT_PUBLIC_FIREBASE_PROJECT_ID,
  storageBucket: process.env.NEXT_PUBLIC_FIREBASE_STORAGE_BUCKET,
  messagingSenderId: process.env.NEXT_PUBLIC_FIREBASE_MESSAGING_SENDER_ID,
  appId: process.env.NEXT_PUBLIC_FIREBASE_APP_ID,
}
- Once pasted, you can go back to firebase setup and click on "Continue to console".
Step 4: Setup Firebase Realtime Database
Now before we write firebase code, we need to create the database first. We will specifically choose to create Firebase's Realtime Database option.
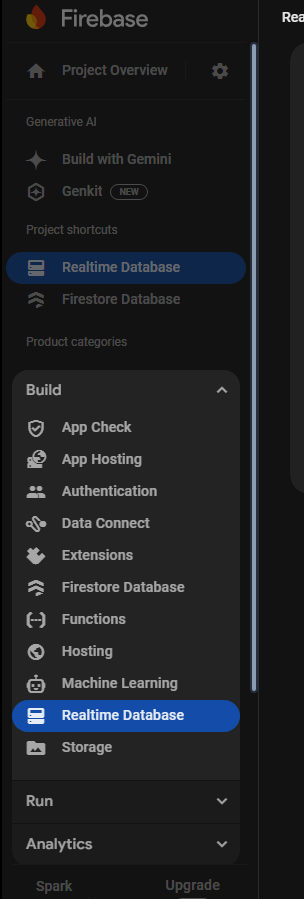
Then you will be in the Realtime Database page, click on Create Database.
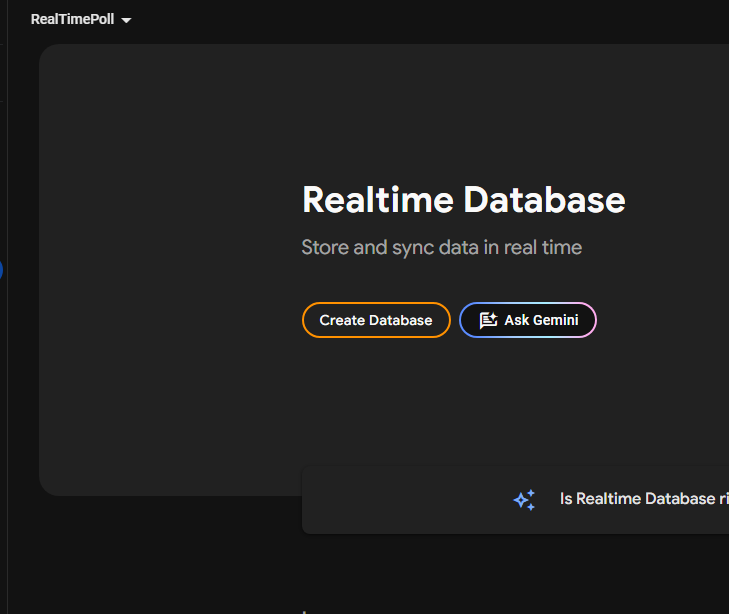
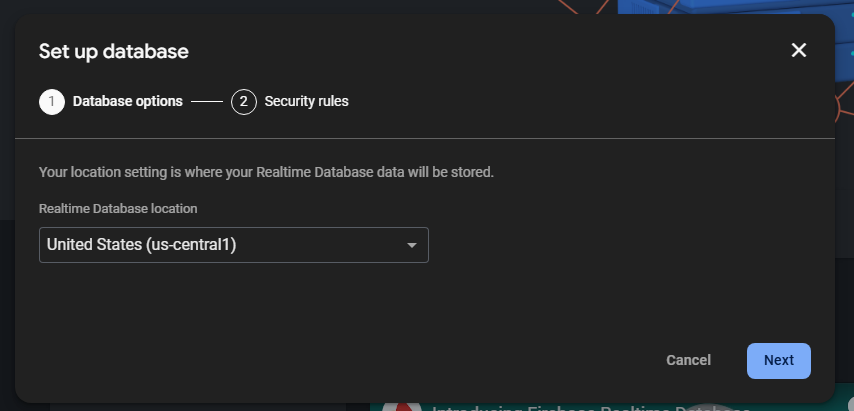
You will be then prompted to choose your Realtime Database location, choose the one nearest.
Choose "Start in test mode" for easier setup (change this later for production)
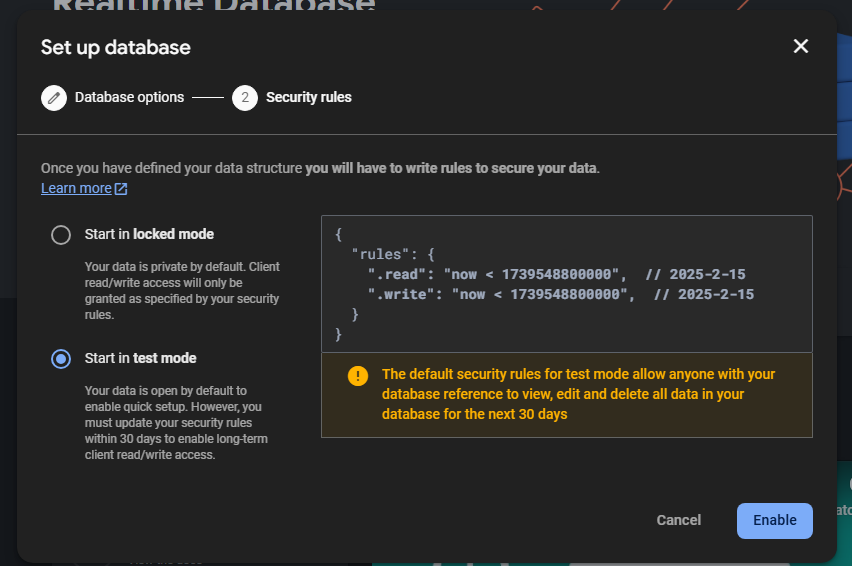
Make sure that in your Realtime Database rules, its set as:
{
  /* Visit https://firebase.google.com/docs/database/security to learn more about security rules. */
  "rules": {
    ".read": true,
    ".write": true
  }
}
⚠️ Important: Replace
truewith actual security rules for production.
Now we are all set up!
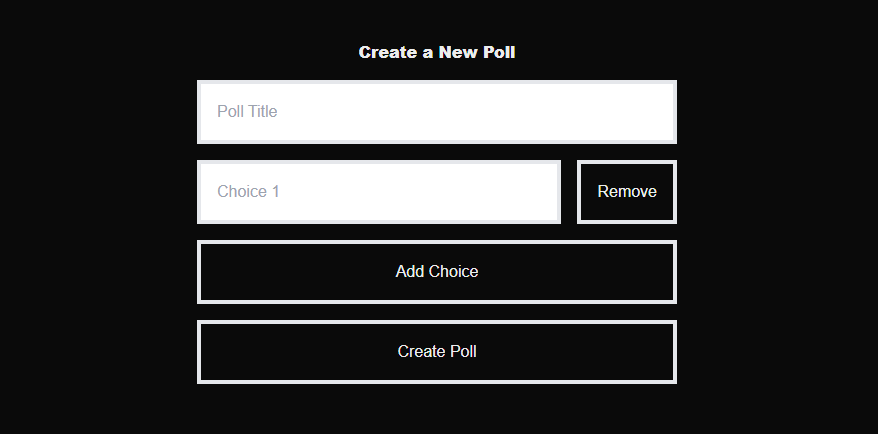
Step 5: Building the Create Poll Page
This page will let users create polls with a title and choices.
// src/app/poll/create/page.tsx
"use client";

import { useState } from "react";
import { useRouter } from "next/navigation";
import { db } from "@/lib/firebase";
import { ref, set } from "firebase/database";

export default function Create() {
    const [title, setTitle] = useState("");
    const [choices, setChoices] = useState([""]);
    const router = useRouter();
    const addChoice = () => setChoices([...choices, ""]);

    const createPoll = async () => {
        // Initilize the poll data
        const pollId = Date.now();
        const pollData = {
            title,
            choices: choices.map((choice) => ({ text: choice, count: 0 })),
            poll_submits: 0,
        };

        // Save poll data to the database
        await set(ref(db, `polls/${pollId}`), pollData);

        // Redirect to the vote page
        router.push(`/poll/vote/${pollId}`);
    };

    return (
        <div className="flex gap-4 flex-col p-12 max-w-xl mx-auto">
            <h1 className="font-black text-center">Create a New Poll</h1>
            <input
                type="text"
                className="text-black p-4 border-4"
                placeholder="Poll Title"
                value={title}
                onChange={(e) => setTitle(e.target.value)}
            />
            {choices.map((choice, index) => (
                <div className="flex gap-4 flex-row" key={index}>
                    <input
                        type="text"
                        className="text-black border-4 p-4 w-full"
                        placeholder={`Choice ${index + 1}`}
                        value={choice}
                        onChange={(e) => {
                            const updatedChoices = [...choices];
                            updatedChoices[index] = e.target.value;
                            setChoices(updatedChoices);
                        }}
                    />
                    <button
                        className="border-4 p-4"
                        onClick={() =>
                            setChoices(choices.filter((_, i) => i !== index))
                        }
                    >
                        Remove
                    </button>
                </div>
            ))}

            <button className="border-4 p-4" onClick={addChoice}>
                Add Choice
            </button>
            <button className="border-4 p-4" onClick={createPoll}>
                Create Poll
            </button>
        </div>

    );

}
Step 5: Building the Vote Page
This page displays the poll choices and lets users vote.
// src/app/vote/[id]/page.tsx
"use client";

import { useState, useEffect } from "react";
import { ref, onValue, increment, update } from "firebase/database";
import { db } from "@/lib/firebase";
import { useParams } from "next/navigation";

export default function VotePoll() {
    interface Poll {
        title: string;
        choices: { text: string; count: number }[];
    }

    const [poll, setPoll] = useState<Poll>();
    const { id } = useParams();

    useEffect(() => {
        if (!id) return;

        // Create a reference to the poll in the database
        const pollRef = ref(db, `polls/${id}`);

        // Fetch the poll data
        onValue(pollRef, (snapshot) => setPoll(snapshot.val()));
    }, [id]);

    const vote = async (index: number) => {
        const choiceRef = ref(db, `polls/${id}/choices/${index}`);
        const pollSubmitsRef = ref(db, `polls/${id}`);

        await update(choiceRef, { count: increment(1) });
        await update(pollSubmitsRef, { poll_submits: increment(1) });
    };

    if (!poll) return <p>Loading...</p>;

    return (
        <div className="flex gap-4 flex-col p-12 max-w-xl mx-auto">
            <h1 className="font-black text-center">{poll.title}</h1>
            {poll.choices.map((choice, index) => (
                <div
                    className="border-4 flex flex-row p-4 items-center"
                    key={index}
                >
                    <button
                        className="border-4 p-4 rounded-full mr-4"
                        onClick={() => vote(index)}
                    >
                        ➕
                    </button>
                    <p className="font-bold ">{choice.text}</p>
                    <p className="ml-auto p-4 text-green-500 ">
                        {choice.count} votes
                    </p>
                </div>
            ))}
        </div>
    );
}
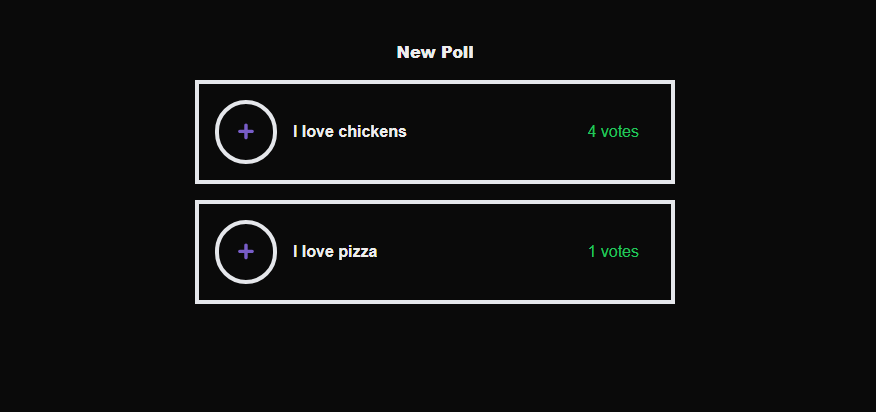
Step 6: Building the home page
This is where we will see the current list of polls available in our Realtime Database, as well as the button for creating a new poll
// src/app/page.tsx
"use client";

import { db } from "@/lib/firebase";
import { ref, onValue } from "firebase/database";
import Link from "next/link";
import { useState, useEffect } from "react";

export default function Home() {
    const [polls, setPolls] = useState<Record<string, { title: string }>>({});

    useEffect(() => {
        const pollsRef = ref(db, `polls`);

        // Listen for changes to the polls data
        onValue(pollsRef, (snapshot) => {
            const data = snapshot.val();
            if (data) {
                setPolls(data);
            } else {
                setPolls({});
            }
        });
    }, []);

    return (
        <div className="flex items-center h-full justify-center gap-4 flex-col p-12">
            <Link className="border p-4" href="/poll/create">
                Create Poll
            </Link>

            <div className="flex flex-col gap-4 w-full max-w-lg">
                {Object.keys(polls).length > 0 ? (
                    Object.entries(polls).map(([id, poll]) => (
                        <Link
                            key={id}
                            href={`/poll/vote/${id}`}
                            className="border p-4 text-center hover:bg-gray-900"
                        >
                            {poll.title}
                        </Link>
                    ))
                ) : (
                    <p>No polls available. Create a new poll!</p>
                )}
            </div>
        </div>
    );
}
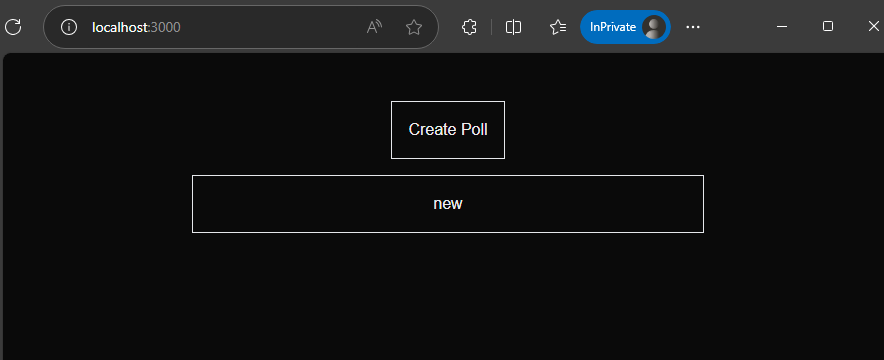
See them update in real time!
You can test this by opening two instances of your browser and they will update at the same time, in real-time!

Conclusion
Well, that's it! You just learned how to use Firebase Realtime Database. There are so many types of applications you can create with Firebase Realtime Database.
In this tutorial, you learned how to design a scalable database structure and integrate Firebase with your Next.js project. Now go forth, and create amazing projects!
GitHub Repository
The full source code for this tutorial is available on GitHub. You can access it here: Github Repo
